Raw File Format
Starting with the definition, the raw file format is the data
format that is native to SSIS. When data is being consumed by the data
flows of an SSIS package it has a format. This format is the same that
appears in raw files.
Since
these are the same file format, SSIS doesn’t have to parse or translate the
data between the data streams or the raw file format. This results in the
raw file format being faster than most other data source and destination
formats
The
raw file format can be incredibly useful. It can be used for either a data source or a data destination.
Once you’ve gotten your hands wet with them, you’ll find a great many
uses. Some of which may solve issues that you’ve run into with previous
development projects.
For
instance if you want to build an SSIS package that processes data in multiple
steps, temporary versions of the data can be stored in raw files and passed
between data flows. This will allow packages to be built such that they
can be restarted at different points in the data processing.
Similar
to the previous example, raw files can be used to exchange data between SSIS
packages. You can develop one package to convert a clients file to a
standardized structure in the raw file format. And then use a couple
other packages to read that format in the next packages that process the data
in a standard format. All of this can be done without hitting the
database.
Another
thing you can do is export data from a database to a raw file to use a
reference file for multiple SSIS packages. If you need to cycle through a
group of IDs or states multiple time, store the data in a raw file and use it
as a data cache. Sure you can use a Lookup Cache instead – but that
doesn’t fit all scenarios and not everyone is using SQL Server 2008.
Let’s
move onto a couple demonstrations
Raw File Format Destination
First
off, let’s build an SSIS package that uses a Raw File as destination.
We’ll fast forward through adding the Data Flow and the OLE DB Source.
The query for the source doesn’t matter for this demonstration so we’ll skip
over that too.
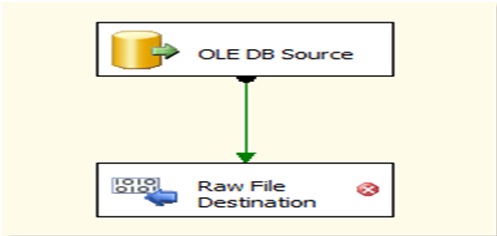
Let’s
begin. Start by dragging a Raw File Destination onto the Data Flow and
connecting the OLE DB Source to it. The package should look like this:

From
here, open the Raw File Destination so that we can configure it. The
first thing you will need to configure is the location for the raw file.
This can either be a static value or tied to a variable. In most cases I
use variables to improve configurability between environments

Next
you’ll configure how you want the Raw File Destination to behave when it
writes. The write option selection is important since it will have
significant impact on how the destination is populated
There
are a few options for this, they are (definitions from Books Online):
- Append: Appends data to an existing file.
The metadata of the appended data must match the file format.
- Create always: Always creates a new file.
- Create once: Creates a new file. If the file
exists, the component fails.
- Truncate and append: Truncates an existing file and
then writes the data to the file. The metadata of the appended data must
match the file format.
Missing
from this list is a Create First Time or Create Metadata option. As you
begin to use the file format more, you’ll realize that this is an important
option to have. Please, help out by voting for a metadata option for raw files.
At
this point, you can move to the next screen and select the columns you
need. There is a select all checkbox for SQL Server 2008 and forward,
which is quite handy. For SQL Server 2005, you need to select all of the
columns individually.

One
extremely nice thing about the Raw File Destination is that the order of the
columns in it don’t matter. Whether you add a column now or in six months
it’s position in the raw data file doesn’t matter. Or if you forget to
add a column that data source expects and it is setup for the source as the
first column.
Execute
the package and you will have a Raw File created.
Raw File Format Source
Now
that we have a file to work with, let’s create a quick package that can import
some data from a raw file. As before, we’ll skip going through adding the
Data Flow and then Raw File Source and Row Sampling task. The Row
Sampling task is just there to provide a place to add a data viewer if you
desire to see the data that is returned.

Configuration
for the the Raw File Source is similar to the Raw File Destination. Open
up the data source and first you determine the location for the raw file.
Same options as above with either be a static value or tied to a variable.

Next
you’ll select the columns that you want returned. They can be selected
through the check boxes or by typing their names in the grid below. The
column names can also be changed at this point in the Output Column column.

At
this point the Raw File Data Source is configured. It knows the
underlying data so there isn’t any need to call up and discuss this with the
person that created the raw file, if it isn’t you. The steps are simple
and not likely to get you bogged down in details – since there really aren’t
any.
Raw File Wrap-Up
Now
that we’ve got through this far, I hope that you see some of the value is using
the raw files. I’ve got a couple upcoming posts in this series that will
go deeper into their actual use, but for now this should get you started.
One
bit of advice that I’ll leave you with. After the data types for you data
source or data destination are set it is wise to change the
ValidateExternalMetadata property to False. This prevents some pesky data
type and file availability issues that can come up during validation and helps
prevent accidentally changing data types.

References Download Package
Thank You
No comments:
Post a Comment